Saturday, 15 December 2018

Jily ready to sew


It feels odd to be posting about a summer top in the winter. Well to be honest it feels weird to be posting about sewing clothes at all as it's not something I've done much of at all this year. It's been quilts all the way! I did manage to sew this top in time for the summer though and I'm very glad I did.  It's the Jily top from Ready to Sew and I saw a few gorgeous versions of this on instagram during Me Made May which inspired me to try it out. I've just pasted in my review from Pattern Review below but added in a tutorial I just found on Megan Nielsen's website which I think would help with making the tie as neat and clean a finish as possible. 


Pattern Description: Jily is fitted at the shoulders and falls into a relaxed fit below the bust. Wear it casual during the day paired with a high waisted jean or make it in a beautiful crêpe for an elegant evening out.

Pattern Sizing: 32 - 46

Did it look like the photo/drawing on the pattern envelope once you were done sewing with it? Yes

Were the instructions easy to follow? Yes. Though I think to get a really good finish you would either need to have some experience of sewing curves or look at an extra tutorial. I took the top to work on at a sewing session at Ray Stitch and the tutor there reminded me about the importance of notching curves and really helped me to get a clean finish on the ties. There is a tutorial on the Ready to Sew website for doing the all in one facing but I think it would be helpful to have one for notching the ties as well. All it says on the instructions is to 'clip and trim where needed' which when it is labelled as a beginner pattern doesn't seem like enough direction to me somehow.


close-up which kind of shows the facing (I meant to take some in progress shots but forgot!)

What did you particularly like or dislike about the pattern? It fits me nicely under the arm and I love the tie front and the shape of it - perfect for summer!

Fabric Used: This was a fabric I bought in Copenhagen about 5 years ago. It is a very lightweight cotton. I only had 1.47 metres in length and 65 cm in width so it was a tight squeeze!

Pattern alterations or any design changes you made: I didn't make any changes to the pattern at all except having to employ some patchworking skills in order to fit all the pattern pieces out of a very narrow piece of fabric! My sizing put me in 36 for bust, 38 for waist and 40 for full hip but it looked like quite a loose fit so I risked it with a straight 36 and it worked out fine.

Would you sew it again? Would you recommend it to others? Oh yes I will definitely sew this again. I'd like to try the version without the tie as well. I would recommend it to others but would say if you're not experienced sewing curves and points maybe check out an extra tutorial to help with getting the ties nice and neat looking such as this tutorial on Megan Nielsen.


Conclusion: I'm really pleased with how this top turned out. I've looked back and I think this was the only garment I sewed this year so I'm glad it's a good one! I wore it loads in the summer and will again next summer.


Thursday, 13 December 2018

Sawtooth star quilt

I just checked back on my blog and the first quilt I made was in 2016 so I can't quite believe that this is me posting about the first quilt I've made for our own home, in 2018!  This quilt was made for my son's first 'big bed' and it's only actually a month late so that's not too bad going.

Sawtooth star quilt
 The idea started with the gorgeous Ray Hoekstra 'Small world' fabric for Cloud 9 fabric.  I've had this fabric since 2016 according to my blog as I used some of it to make a bag for my nephew but I can't remember where I bought it.  Sometime in 2017 I made two blocks with the 'small world' fabric just to try out the Sawtooth star block.  I never did anything with them though so this year, when I decided to make a quilt for my son, I went back to these blocks and decided to use them as the starting point.
Sawtooth star quilt block
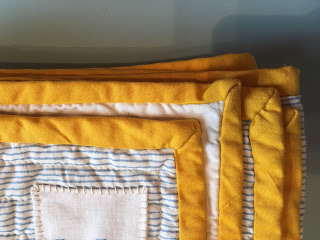
 In addition to the 'small world' fabric I found this lovely warm yellow baby cord on the Minerva Crafts website.  They have a great sample service so I ordered a sample first to check the colour matched. The white fabric is mostly a 100% cotton sheet from a local charity shop, although the eagle-eyed among you may spot that two of the blocks have a slightly different shade of white, these were the first two blocks I made in 2017. I just used scraps of white fabric for them and unfortunately they were slightly different to the white in the rest of the quilt. The backing is a 100% organic cotton duvet cover, John Lewis via the local charity shop (so far it's been used to back 3 quilts and I still have some scraps left, not bad for £2 or £3!). I used Aurifil 50wt thread for the quilting.

Quilt backing
Close-up of quilting on the back of the quilt
The Suzy Quilts tutorial for the Sawtooth Star block is really good if you haven't made one before, or even if you had and you just want a wee reminder.  It gives you the different sizes to cut for each fabric for 4 different sized blocks. I started this way back in February and although the stars were fairly quick to put together it took a while to decide on the design, make it the size I wanted (roughly 44"x 64"), and decide how to quilt it.  The stars are 12" stars.  This quilt was sitting basted and ready to quilt for ages before I finally made a decision on the quilting.  I initially just had one diamond shape on top of each star but i decided it really needed the smaller one too to make it secure, and get the look I wanted.  When I started binding it I realised I hadn't made enough binding so had to stop again to make extra, luckily there were just enough scraps left!  I think this quilt has turned out really well, I love the colours and the design and luckily my son loves it too, and that's the most important thing.
Sawtooth star quilt
I was reading something recently (sorry I can't remember where) about handmade gifts. The post writer talked about thinking about the recipient while making the gift, about  pouring your love and admiration for that person into the gift.  That's what I think is so special about handmade gifts, and that is what I try and do when I make a quilt or any other gift for someone. All my love for my son is in this quilt and hopefully he will treasure it for years to come.

I'm trying to finish off lots of WIP (works in progress) before the end of the year, and post about them on my blog, so hopefully I'll be around here a bit more often.  Is anyone else trying to finish off projects before the end of the year?!


Saturday, 8 December 2018

'Over the rainbow' baby quilt


This quilt has been finished for a while but it's taken me ages to get photos of it.  It's a very special quilt for a very special person, my son's key worker from nursery.  She has just had a baby (well 3 months ago now so I'm a bit behind!) and my son had just moved on from nursery to school so I wanted to give her a special gift.  She is such a lovely person and we felt so lucky that she was our son's key worker, and friend, for the past 2 & 1/2 years.  The inspiration for this quilt was one I saw on london_and_granger's instagram.  If I had been making it for me I'd probably have gone for similarly bright colours but I knew that the mum this is a gift for likes to wear a lot of blue and denim so I decided to stick to a more muted colour scheme.
Leah Duncan fabric
Leah Duncan fabric
The starting point for the quilt was the beautiful Leah Duncan bird and rainbow prints from the No Place Like Home collection.  I knew I wanted to stick to mostly blues but felt the pale peach went so well that I had to add that in.  Asides from the dark blue chambray and the pale peach, which I had already, all the other fabrics were bought from M is for Make specifically for this project.  The backing is the last of a beautiful blue/white striped double or king (I can't remember which) John Lewis cotton duvet cover I got in a local charity shop.  I also used this to back this a quilt for my son which hopefully I'll get photos of soon! The binding was a roll of chambray binding one of my lovely friends gave me and it matches so perfectly. It's the first time I've used shop bought binding on a quilt and I must say it did speed the process up a fair bit not having to make the binding! As usual I used the attaching double fold bias binding tutorial from Purl Soho.

I used the hst tutorial from Suzy Quilts as a reminder on how to do half square triangles and cut them as 9" squares as I had just bought a 9" square quilting ruler so it made for nice and easy, and quick, cutting out! I did draw out the layout beforehand, though I altered it slightly when I put them all together.  Does anyone ever stick to exactly their initial plan with a quilt? I know mine always end up changing throughout the process of making!

quilt design plan, with multiple changes added/scored out etc!

 With shop bought bias binding, a 9" square ruler, and chain piecing, this quilt top was pretty quick to put together.  The quilting took a bit longer though as I couldn't decide what, or more precisely, how much, quilting to do.  I took the question to instagram and The Littlest Thistle had some very good advice - check the batting instructions for advice on how far apart the quilting lines should be, and try and anchor all the squares evenly.  I should have taken some indoor photos of the back of the quilt so you could see the quilting better but I found some earlier photos I took of the front of it so hopefully you can see it there.  I'm very pleased with how it's turned out. I love this quilt so much and my son did too, I hope it is well loved in its new home.


Thursday, 23 August 2018

Beach bag and minimalist holiday packing

Minimalist holiday packing - does anyone else try to pack as little as they can to go on holiday?! I find now that with the addition of clothes, toys and books for a 4 year old, plus a few books for myself and my husband I don't really have much room for clothes. Well I mean taking a bigger case and checking in luggage is always an option but we really prefer not to do this as it always adds waiting time at the airports at either end so we have stuck to hand luggage on as many trips as we can.


holiday wardrobe

This was my holiday wardrobe for 10 days in Italy. I took:
Grainline tiny pocket tank (this has been worn so much, I love it!)
American Apparel chambray short-sleeved shirt (worn travelling there & back)
Lilac Megan Nielsen Brumby skirt
Pink Megan Nielsen Brumby skirt
& Other stories striped shorts
Named Patterns Inari tee dress
Japanese dress book Dress D in dark chambray from Merchant & Mills
Brick/rust trousers from Asos

Japanese dress book Dress D
I wore a pair of Steve Madden brown leather sandals and didn't take any other shoes with me, oh and I wore my denim jacket travelling. The only addition to this was two bikinis, underwear and a pyjama short set. There were points when I wished for a better pair of shoes for walking but asides from that there wasn't anything I wished I'd brought, and I wore everything that was with me.  It really brought home to me that I don't need a huge amount of clothes, especially in summer when things can be washed & dried so quickly. I'm gradually getting rid of things now that don't get worn, even things I've made, and it's satisfying to see my wardrobe getting smaller but full of things that are worn a lot and well loved. 
beach bag in situ by the pool at our holiday apartment in Ossuccio, Lake Como

Talking of things that are well loved I also made myself a new beach bag for going away (even though we weren't going to the beach!).  This bag was made from a linen skirt I bought in Hobbs in 2010.  It was bought for a special occasion - a memorial exhibition which I organised of my mum's art work to raise money for Eve - the charity for gynaecological cancers.  The exhibition was a success, it was a lovely event where I got to chat with lots of my mum's friends, and look at all her artwork together in one room. So the skirt holds some sentimental value for me.  It has lasted me really well and was worn up until last summer when it just started to look a bit tatty, it had some holes and some stains around the hem which I couldn't shift. When I mentioned to a friend that I'd like to make it into a beach bag she kindly did me a little mock up of how to do a bag with square corners to make it roomier.  I went to an evening sewing session at Ray Stitch - where you bring your own projects to work on with the benefit of an experienced sewing instructor, as well as lots of other lovely people to chat too! I bought the bright pink webbing there to add a bit of contrast with the straps and, thanks to some extra tips from Rosie the instructor that evening, I came away with a very neat and roomy beach bag! It came in so useful on holiday and was used every day to carry about water bottle, books, pac-a-macs, sun cream (we had very changeable weather the first few days!), beach towels etc.

I don't get so much sewing time nowadays, and when I do it's usually quilts I'm drawn to sewing.  I wear pretty much all the things in my wardrobe and am gradually culling it of the things that don't get worn.  Recently I made a Maya top that was not a success - a combination of cheap polyester fabric and rusty sewing skills - but I'm not dwelling on it as the next sew was a big success - the 'Jily' top by Ready to Sew.  I'll share a review of the pattern soon! I'm trying to cull my fabric stash now too and get rid of fabrics I wouldn't wear if I saw them as garments in a shop, sometimes these fabrics move to my quilting supplies but there are definitely a few that can go to the charity shop. I've never been tempted to read the Mari Kondo book or try that method but am coming round to it a bit now, especially seeing how much stuff we still haven't unpacked since we moved 4 months ago!  The blog Be More with Less has also had some inspiring posts I've read recently so maybe there's a wider decluttering phase starting for me!

the skirt in its original form

an example of one of the holes in the fabric

Thursday, 7 June 2018

Stripes and Herringbone quilt

This quilt started when I spotted the free Stripes & Herringbone Robert Kaufman pattern and I've unimaginatively just copied the colour scheme used in the pattern!  I am very pleased with how this one turned out but I did struggle a bit with it for a number of reasons.  Trying to match up irregular stripes on the bias is.. impossible of course but I still wanted it to look vaguely in line so this took a while. The yellow and white stripes are sewn together with wavy stitching. This wasn't hard to sew but was a nightmare to press!


Finished Stripes & herringbone quilt
This is the first quilt in a while that I bought fabric specifically for, the striped fabric. Which of course I now can't remember the name or brand, or where I bought it.  It's a lovely irregular cream & black stripe.  The yellow is Kona cotton in curry which again I had bought more of for my Maritime quilt.  The white is from a lovely duvet cover I got in a charity shop, 100% cotton. I almost kept it to use as a duvet cover but needed it for quilting more.  The backing is more of the John Lewis charity shop find duvet cover which I used for my maritime quilt and an in-progress quilt for my son. Again it's 100% cotton, great quality cotton. 


close-up of backing fabric


 This is a free pattern and I did find the instructions a little bit on the minimal side but then there were quite a few new techniques for me so it probably wouldn't be a hard sew for a more experienced quilter.  The quilting is done with wavy lines on the yellow and white lines which was easier than I expected.  The straight line quilting on the black & cream though, that took me a while.  I started by sewing lines at regular intervals but I didn't like how this was looking as some of the quilting was on the black and some on the cream.  I unpicked it all and sewed all the quilting lines in the cream section without worrying about making them regular.  The bias binding was machine stitched to the front then hand sewn on the back with a blind stitch.  I find making quilts very therapeutic, I saw a comment on instagram today that I can't locate now but it was someone working on a beautiful quilt who commented that they found turning their scraps into an intricate design to be a form of therapy and I could totally relate to that.  There is something so satisfying about creating something that you know will be played on, sat on, slept on, used for warmth, for comfort, and I think this is why quiltmaking has become so important to me.  I get such a sense of wellbeing out of creating a quilt as well as a lot of enjoyment out of all the different stages of the process. Does sewing provide this for you? Or other creative outlets perhaps?


close-up of wavy line quilting
It was really good to sew a quilt with a few different techniques and I'm really pleased with how this turned out.  It is now with its new owner and hopefully being played on already! Next up with quilts? Time to get the quilting done on the quilt I've made for our son's new bedroom!


another photo to give you an idea of the finished size

Saturday, 5 May 2018

Maritime quilt

I can't believe I'm posting two versions of this quilt pattern in a row - just in case it wasn't already obvious how much I love this pattern!  This version was made for the new daughter of a good friend of mine.  They live by the sea so I thought including the Charley Harper maritime print in the middle was a nice touch, and I knew she'd like the design too (my friend that is, not the new baby, well I mean I'm sure the baby will too!).


The Charley Harper fabric was leftover from another quilt backing and luckily it was enough to do the middle row of arrows.  I think it works really well with the Kona Cotton in 'Curry'.  I didn't have enough of the Kona Curry left so I went back to Village Haberdashery to get more but they were out of stock. Luckily I found more on eBay which was delivered quickly - it still took me ages to make this quilt though as we've moved house recently which has taken up so much time, and stress and anxiety but I'm sure anyone who's moved house will understand that!  The white is a lovely 100% cotton sheet from a local charity shop (I always wash them on a very high wash when I buy them and obviously only buy ones that are clean to begin with!).


As you can see I'm still sticking to straight line quilting but since this quilt I've had a go at wavy line quilting which I love the look of too.  I'll build up the courage to try some free motion quilting soon!  However I think with this particular design the straight lines work best.


The batting is 100% bamboo and is so lovely and soft.  The backing fabric is a 100% cotton double duvet cover from John Lewis which I found in a charity shop.  It is such lovely quality and didn't look like it had been used!  So far I've used it for 3 quilt backings and still have some left over. 


I remembered to add a quilt label to this one and I really need to try and remember to do this with every quilt. I used a rectangle of white fabric, covered it in spray starch, ironed it then used a Pigma Micron pen to write the label.  I like how it looks when the label is handsewn on the back like this but I wonder if maybe I'd be better machine stitching it to the backing fabric before making the quilt sandwich, or machine sewing it into the binding at a diagonal angle to make it more hardwearing? I'm working on one more babyquilt for a friend, one for Harris and one for me but I am planning to get some garment sewing in this month too! I have two Marilla Walker Maya tops cut out which I'd like to sew up and I'd like to get started on a test pair of trousers - New Look 6459.


Wednesday, 4 April 2018

Up above the clouds quilt

Can you tell yet that I love this quilt pattern?! This is my third version and I had so much fun picking out the fabrics!
 

Unusually for me this quilt really started with the backing fabric.  It's a Leah Duncan fabric called Up Above the Clouds So High. 

When my husband's best friend and his wife told us they were expecting a baby I knew I wanted to make them a quilt and this fabric immediately came to my mind as it just seemed so happy to me and the colours lovely and bright for a baby.  I had bought this fabric quite a while ago as I just couldn't resist it but I had to buy a bit extra in order to have enough for the entire back so now I still have some scraps left which is nice!


As I already had the backing fabric I just had to find matching fabrics for the front and plan the design.


I decided to pick out two of the colours and went with the pink and yellow.  The pink kona is the same pink as in the Sleep Tight panel quilt I just posted about but I can't remember what shade it is.  Sorry but I can't find the receipt for the yellow fabric either but I know it's a Cotton + Steel design.  The colours go so well together but I knew I wanted to use something different for the binding.  It's probably quite hard to see in these photos but the binding fabric is a lovely thin navy & white stripe.  This was an Ikea duvet cover which I have used for so many different quilting and crafting projects as it is such a nice fabric.  I wanted the design to be quite bold and simple as the backing fabric is quite busy so the Bow & Arrows pattern by Suzy Quilts was perfect.  This won't be the last time you see this quilt pattern (I have another in the works as I write this) as I think it is a very well designed and well explained pattern.  I should probably spend a bit more time squaring off all my blocks but I'm just not that much of a perfectionist when it comes down to it. I get so much enjoyment out of the process of quilting that I'm not going to worry too much about perceived imperfections as it's the overall impact of the quilt that matters to me and the amount of thought and love that went into it.


Tuesday, 3 April 2018

Winter wardrobe staples

Still trying to document my backlog of projects here so bear with me as I post some wintery clothes.  I'd rather do this before spring properly rolls around (soon hopefully?!) so I'm doing a two-in-one post here.  The skirt is really rather special as the fabric holds a lot of sentimental value for me as it belonged to my mum.  It works so well with this new plantain tee that it makes sense to write about then together.

 
Colette Meringue skirt in blue cashmere and Deer & Doe plantain tee in golden yellow cotton jersey


Details - Pattern: Colette Meringue Skirt


Size: I cut a size 6, this is given as a 29.5” waist & 41” hip which meant no alterations for me. However the waist doesn’t sit at the natural waist, it sits lower. Looking at the pattern this is the way it is designed to sit so it’s just something to keep in mind when picking a size.

Fabric & notions:  Beautiful dark blue speckled cashmere made in Scotland. This fabric belonged to my mum and was in her stash since the early 80s so it is at least 25 years old, possibly older. Only one small moth hole in it which thankfully doesn't show! I washed it in the machine on the wool setting and it came out fine. the lining fabric is a pink polyester I got in a fabric swap at a sewing meet-up. Faux leather for the waist binding.

Were the instructions clear? I didn't use the instructions as it's a pretty simple construction. However I did refer to the instructions for lining a skirt from my Great British Sewing Bee 'Fashion with Fabric' book. This is now one of my go-to places for guidelines on sewing techniques. I also used the technique given in this book for finishing the waist with faux leather binding. Whenever I’m doing an invisible zip now I tack the zip in place by hand on each side before sewing. This has really improved how neat my zips are. Then I just machine sew with the standard machine foot.

Pattern alterations or any design changes you made/changes I would make next time: Most obviously I removed the scallops.  I also added pockets (I have made this pattern up before with pockets, the tutorial for the pockets was online but I can't find the link now). I used a lovely Cotton & Steel cat print cotton for the pocket lining. This time I also added a full skirt lining.

pocket detail

pocket lining fabric

pink lining & selvage on hem (had to keep that -'Cashmere Made in Scotland')

Total cost: I've had the pattern for years so I'm not counting it as a cost, likewise the fabric and lining were free so the only cost was a navy invisible zip and the faux leather binding so probably about £5?

Conclusion: This is a great basic pattern and works well for me as I don’t have to make any alterations. The first time I made this skirt, without the lining, I hadn’t been sewing that long, so I’d say it’s a great skirt for a beginners project.


Details - Pattern: Deer & Doe Plantain tee

 
Size: I've made this lots of times & my pattern pieces were cut at a size 38 at the bust grading out to a 40 at the waist and 42 at the hips but on this version I tapered it in again a bit at the waist and hips. I might also have reduced the scoop neck a bit when I first traced this out but it was so long ago I can’t remember.

Fabric & notions:
Mustard/golden yellow cotton jersey which I got from a fabric swap at a sewing meet-up in Glasgow.  It's a gorgeous tone of yellow and a good quality cotton jersey.

Were the instructions clear?: Yes. I don’t tend to use the instructions now as I’ve made this, and other t-shirt patterns, so often now. But I remember as a beginner finding these instructions really clear. However I do find the 5/8” seam allowance to be quite large for sewing with knits. I just sew with my regular machine, one line of straight stitches with a line of small zigzag right beside it. I didn’t bother finishing the seams on this.


Pattern alterations or any design changes you made/changes I would make next time:
I've never used the elbow patch pattern piece but asides from that the only changes I've made to this version were to bring it in a bit towards the waist as I said in the size section above.  This is such a great basic tshirt pattern. I particularly like the low scoop neck.

Total cost:  The pattern is free, the fabric came from a fabric swap. I think I had to buy the thread so say £2?

Conclusion: A great basic tshirt pattern that is also suitable for various adaptations (it makes a great tshirt dress!)

I have had so much wear out of both these items since I made them in December and can't believe it took me over a year to actually sew them up as I had the fabric for both cut out for about a year before I got round to sewing them!  So is everyone else desperate to start on some summer sewing too?! and who's signing up for Me Made May this year?  I'm going to do it again.  I doubt I'll get many photos taken but I still enjoy the challenge and find it useful in planning what to sew.

Monday, 2 April 2018

Sleep Tight panel quilt

Well hello there! I can't believe I haven't posted anything since November!  I have been sewing a lot, mostly quilts but also some clothes for me and my son.  So to back up a bit this quilt was gifted to a friend's baby in December.  When I saw the panel I thought it would be perfect for one of the baby quilts I had planned. The panel is a Cotton + Steel fabric, from the Sleep Tight collection by Sarah Watts and you should still be able to see it here.


When I ordered the panel I asked Kate for advice on co-ordinating solids so she picked out the blue & the pink which both match perfectly.  I decided on adding triangles to echo the shape of the mountain and the tree and found this tutorial for doing half rectangle triangles.   I really enjoyed making these half rectangle triangles and working out how I was going to put it all together.  I realise it's a very simple design but it was still nice trying to work it out and I'd like to do more quilts where I don't follow complete quilt patterns.  Once it was together I felt it needed something else as a border so added the striped fabric (bought for another quilt which will hopefully get finished soon).  The backing fabric is 'minky fabric' which I bought at the Festival of Quilts last August.  So this doesn't actually have any quilt batting in it, instead I just used the quilt front with the minky fabric then did a bit of machine quilting on top.  I used my standard technique for binding which is to make double-fold bias binding, machine stitch it to the front then blind stitch by hand on the reverse.  The minky fabric makes this so lovely and soft and as it's not quite so big I thought it might be useful as a pram blanket.

When I think back to my first few quilts I do wonder how they're holding up to washing as I had no idea about how to finish the threads off and just knotted them on the outside.  Since then though I've been using a technique for finishing the threads by hiding them inside the quilt.  This is a really good video tutorial which explains it much better than I can!

It was nice to work with a panel in the centre and plan the quilt design round that and I'm so pleased with how this turned out!