Showing posts with label Bow and arrows quilt. Show all posts

Saturday, 5 May 2018

Maritime quilt

I can't believe I'm posting two versions of this quilt pattern in a row - just in case it wasn't already obvious how much I love this pattern!  This version was made for the new daughter of a good friend of mine.  They live by the sea so I thought including the Charley Harper maritime print in the middle was a nice touch, and I knew she'd like the design too (my friend that is, not the new baby, well I mean I'm sure the baby will too!).


The Charley Harper fabric was leftover from another quilt backing and luckily it was enough to do the middle row of arrows.  I think it works really well with the Kona Cotton in 'Curry'.  I didn't have enough of the Kona Curry left so I went back to Village Haberdashery to get more but they were out of stock. Luckily I found more on eBay which was delivered quickly - it still took me ages to make this quilt though as we've moved house recently which has taken up so much time, and stress and anxiety but I'm sure anyone who's moved house will understand that!  The white is a lovely 100% cotton sheet from a local charity shop (I always wash them on a very high wash when I buy them and obviously only buy ones that are clean to begin with!).


As you can see I'm still sticking to straight line quilting but since this quilt I've had a go at wavy line quilting which I love the look of too.  I'll build up the courage to try some free motion quilting soon!  However I think with this particular design the straight lines work best.


The batting is 100% bamboo and is so lovely and soft.  The backing fabric is a 100% cotton double duvet cover from John Lewis which I found in a charity shop.  It is such lovely quality and didn't look like it had been used!  So far I've used it for 3 quilt backings and still have some left over. 


I remembered to add a quilt label to this one and I really need to try and remember to do this with every quilt. I used a rectangle of white fabric, covered it in spray starch, ironed it then used a Pigma Micron pen to write the label.  I like how it looks when the label is handsewn on the back like this but I wonder if maybe I'd be better machine stitching it to the backing fabric before making the quilt sandwich, or machine sewing it into the binding at a diagonal angle to make it more hardwearing? I'm working on one more babyquilt for a friend, one for Harris and one for me but I am planning to get some garment sewing in this month too! I have two Marilla Walker Maya tops cut out which I'd like to sew up and I'd like to get started on a test pair of trousers - New Look 6459.


Wednesday, 4 April 2018

Up above the clouds quilt

Can you tell yet that I love this quilt pattern?! This is my third version and I had so much fun picking out the fabrics!
 

Unusually for me this quilt really started with the backing fabric.  It's a Leah Duncan fabric called Up Above the Clouds So High. 

When my husband's best friend and his wife told us they were expecting a baby I knew I wanted to make them a quilt and this fabric immediately came to my mind as it just seemed so happy to me and the colours lovely and bright for a baby.  I had bought this fabric quite a while ago as I just couldn't resist it but I had to buy a bit extra in order to have enough for the entire back so now I still have some scraps left which is nice!


As I already had the backing fabric I just had to find matching fabrics for the front and plan the design.


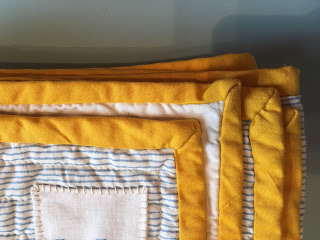
I decided to pick out two of the colours and went with the pink and yellow.  The pink kona is the same pink as in the Sleep Tight panel quilt I just posted about but I can't remember what shade it is.  Sorry but I can't find the receipt for the yellow fabric either but I know it's a Cotton + Steel design.  The colours go so well together but I knew I wanted to use something different for the binding.  It's probably quite hard to see in these photos but the binding fabric is a lovely thin navy & white stripe.  This was an Ikea duvet cover which I have used for so many different quilting and crafting projects as it is such a nice fabric.  I wanted the design to be quite bold and simple as the backing fabric is quite busy so the Bow & Arrows pattern by Suzy Quilts was perfect.  This won't be the last time you see this quilt pattern (I have another in the works as I write this) as I think it is a very well designed and well explained pattern.  I should probably spend a bit more time squaring off all my blocks but I'm just not that much of a perfectionist when it comes down to it. I get so much enjoyment out of the process of quilting that I'm not going to worry too much about perceived imperfections as it's the overall impact of the quilt that matters to me and the amount of thought and love that went into it.


Friday, 12 August 2016

Bow and arrows quilt


This is the Bow & Arrows quilt pattern from Suzy Quilts and I can't believe this is the best photo I got of the finished quilt as I absolutely love it! I'll need to ask the recipient if I can take some better photos next time I'm back in Scotland. Even from these photos you can see how well it turned out. I had so much fun sewing it up, especially hand-sewing the binding on in the sun in my dad's garden!

Soaking up the sun, ready for hand stitching the binding.
This is the baby quilt size and I totally copied the colour way Suzy gives in the PDF pattern.  I was so pleased when I remembered I had these blue & yellow fabrics in my stash as they look so good together. The backing fabric is brilliant too, Retro Rockets by Michael Miller. It took me a while to find this online and I ordered 2 metres of it from Cloth Ears.  I'm considering buying more as I just love it and it's perfect for baby quilts! The white fabric is a lovely quality sheet from a charity shop which cost the princely sum of £2!

Backing fabric - Retro rocket by Michael Miller
Imperfect lines
One thing I've realised with quilt making - I am so not a perfectionist!! In fact I like imperfections.  When I started machine quilting this I was worried about getting the lines perfectly straight. Then I decided to treat it just as I would if I was drawing - that is just go for it. My lines are not all straight or uniform but I really like how this looks.  My mum used to do really wonderful pen line drawings and I always loved how strong and decisive her lines were even though, or perhaps because, they weren't all uniform.
I followed the pattern exactly (as you can see!) which worked out well mostly. The only issue I had was the lengths given for the border pieces. It instructs you to cut 4 of the same length which obviously isn't' necessary as you have 2 shorter sides, and weirdly the length you are to cut is too long for the short sides and too short for the longer sides! So I ended up having to cut and join a few times. I think next time I'll work out what lengths I need for sides and top & bottom and cut accordingly.  I used the stated 1/4" seam allowance throughout. Incidentally if, like me, you're new to quilting check out this great post on advice on quilting.

I wasn't very keen on the basic method for making Flying Geese as it creates quite a bit of waste. Well it won't be waste as I intend to try and use them in a scrappy quilt. However I think if I made this again I would try and use the no-waste method, which she explains in the pattern too.
Flying geese - you can see all the wasted fabric on the left.
I also had a few issues this time with machine quilting. I don't have a special foot so I was just using the straight stitch foot with a 2 1/2 - 3 stitch length.  I found that I got quite a bit of gathering of the fabric. This might have been because the fabrics I used were thicker than my last quilt, or maybe because I was quilting more lines but I realised I really need to give my free motion embroidering foot a go for this.  And maybe ask for a walking foot for my Christmas! I've also realised you get special needles for machine quilting, and special threads, so I'll try these out too. Always so many things to learn! If anyone has any tips I'd love to hear them as I'm such a beginner to quilt making! Also if anyone has any particular quilt designers or artists they like please let me know as I'm having such a great time finding out more about improvised quilting, the history of quilt making, and all the different artists out there working in quilts.


Machine quilting